
How to Paint Wooden Blinds: A Quick and Easy Guide
If you’re looking to freshen up your space with a new look, painting wooden blinds can be an effective and inexpensive way to update your home decor. Painting wooden blinds not only adds a pop of color but also gives them a fresh, clean appearance. In this guide, we’ll cover everything you need to know to transform your blinds with just some paint and creativity.

Imagine turning those old, dull wooden blinds into a stylish feature in your room. Ready to get started? Whether you’re a DIY pro or a complete novice, painting your blinds is easier than you might think. With a little effort, you can make a big impact in your space.
Get the Fail-Safe Paint Color Playbook (Free PDF)
36 proven colors • 8 ready palettes • trim & sheen guide • printable testing cards.
Grab your tools, get your favorite color, and let’s dive into the process. You’ll be amazed at how simple changes, like new blinds, can complement your decor and add personality to your home.
Preparing Your Workspace
Before painting wooden blinds, you must prepare your workspace to ensure a smooth process. Key steps include selecting the suitable paint for your blinds and gathering necessary materials like a paintbrush, sandpaper, and primer.
Choosing the Right Paint
When painting wooden blinds, the paint type is crucial. Begin by evaluating your options. Enamel paint, for instance, is a popular choice. It’s durable and easy to clean. If you wish to use spray paint, consider using a shellac spray primer first. This will ensure the paint sticks well.
Make sure to choose a paint that matches the look you want. Acrylic-based enamel paints work well because they provide a smooth finish. Keep in mind the durability of each option, as blinds are often exposed to sunlight and dust. This might mean using a varnish to seal the paint for added protection.
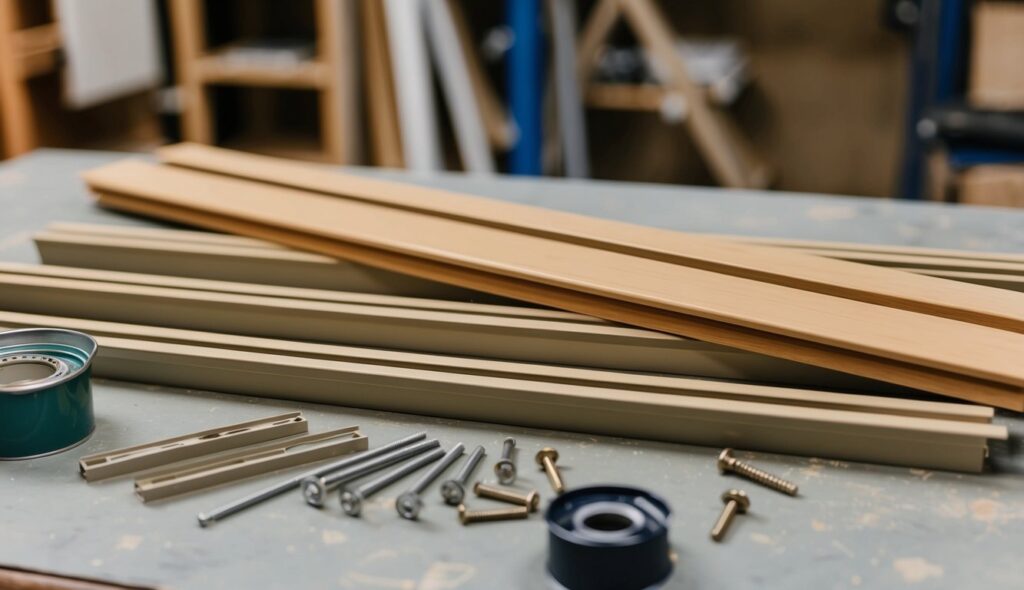
Gathering Materials
Getting the right materials is vital. You don’t want to start painting and realize something’s missing, right? First, grab your sandpaper. You’ll need this to smooth out the surfaces of your blinds. Choose a fine grit that won’t damage the wood.
For application, a paintbrush or sprayer might be your best friends. You’ll also need primer to ensure the paint adheres nicely to the blinds. Don’t forget a drop cloth to protect your workspace. Checking off each item can keep your painting project on the right track and prevent unnecessary delays.
Disassembling Wooden Blinds
Taking apart wooden blinds can be an easy task if you follow the right steps. You’ll need to start by removing the blinds from the windows and then move on to separating the slats. Let’s break it all down.
Removing Blinds from Windows
To begin, you need to remove the blinds from the windows. Grab a sturdy ladder or a step stool for higher windows. Look for the brackets at the top that hold the blinds in place. These are often secured with small clips or screws. If they have clips, gently push the clips back to release the headrail. If they’re screwed in, use a screwdriver to remove the screws.
Once you detach the headrail, slowly lower the blinds. Be cautious not to damage any parts during removal. It helps to have a friend assist if the blinds are large or heavy. Carefully set your blinds on a flat surface where you can work comfortably. Don’t forget to gather any screws or clips in a small container, so you’ll have them ready for reinstallation!
Disassembling Slats
With the blinds off the window, it’s time to disassemble the slats. Begin by inspecting the cords that run through the blinds. These cords usually control lifting and tilting of the slats. You’ll notice knots at the end of these cords. Undo these knots carefully, making sure not to damage the cords.
Next, slide each slat out from between the cords. Work slowly to avoid any tangles or cracking. It’s a good idea to label each slat if they’re different sizes. This way, you’ll know exactly where they belong when it’s time to reassemble them. Once all slats are free, you can then clean or paint them, ensuring an even finish with no obstacles in the way. Enjoy the pride of your detailed work!
Cleaning and Priming
To paint wooden blinds properly, it’s crucial to clean and prime them. Dusting removes any dirt, while cleaning surfaces ensures smooth priming. The primer helps the paint adhere better, giving your blinds a uniform look.
Dust and Clean
Start by thoroughly dusting the blinds. A vacuum can be helpful for removing loose dirt, especially in those hard-to-reach slats. If you prefer to joke around with cleaning, think of vacuuming as giving your blinds a ‘spa day.’
Once dust-free, mix some white vinegar with warm water in equal parts. Dip a microfiber cloth in the solution, wring it out a bit, and gently wipe the surface. The vinegar method acts as a natural cleaner and is great for both PVC and faux wood.
Gently clean each slat being careful not to soak the wood. You want to maintain the natural warmth of the material without damaging it. Let them dry completely. This step is vital for making sure that your wooden blinds feel appreciated and loved before the painting process begins.
Applying Primer
Priming is like putting sunscreen on your skin—crucial and protective! A good primer saves your blinds from peeling or unsightly patches in the future. It’s like preparing them for their new ‘makeover.’
Choose a high-quality wood primer and apply a thin coat on each slat. Doing so will make the paint adhere much better. Holding the slats steady ensures even coverage. Use a brush or spray, depending on your comfort, but make sure the coat is even.
Allow the primer to dry according to the instructions on the label. This patience pays off by giving the main paint layer a smooth base on which to cling. Follow these steps to make your wooden blinds the envy of everyone who sees them!
Sanding the Slats
When painting wooden blinds, smooth and clean surfaces ensure better paint adhesion. Sanding is key because it helps remove old finishes and rough spots.
Preparing for a Smooth Surface
First things first—grab some sandpaper, preferably a medium-grit like 120. Wrap it around a sanding block to keep it stable. This will be your magic wand for smoothing out those slats. You want to sand each slat gently, moving back and forth or in circles. Too much pressure? You might damage the wood or take off too much. So go easy! Don’t forget the edges and corners. A smooth surface is easier to paint and makes your blinds look great in the end. Check the surface by touching it. If it’s smooth, you’re ready for the next step!
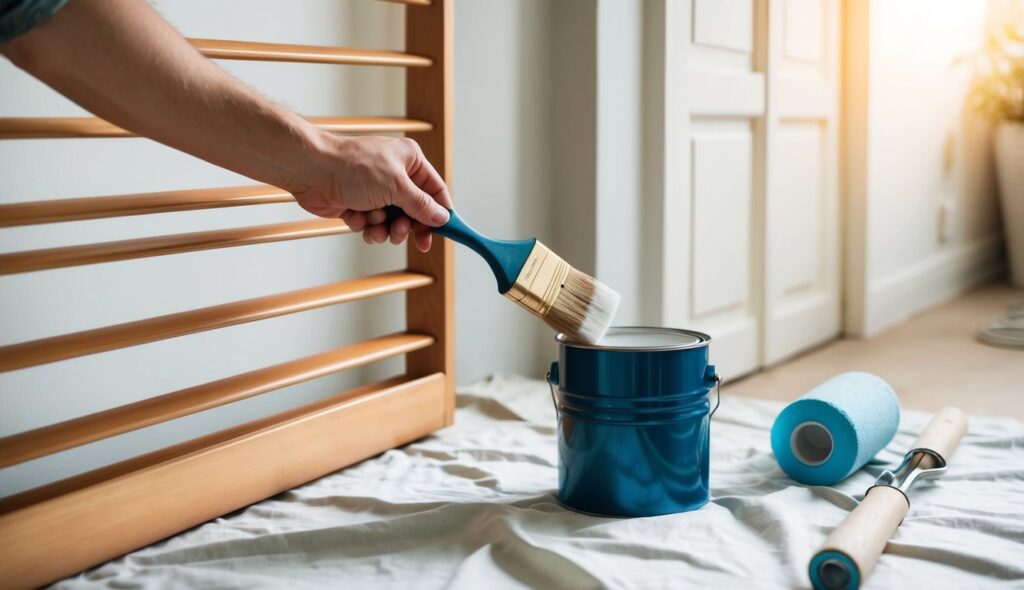
Painting Process
When painting wooden blinds, the first thing to decide is whether to use a paintbrush or spray paint. Each method has its unique benefits, and the choice often depends on the finish you want. After choosing the painting method, applying multiple coats is key for a smooth and durable finish.
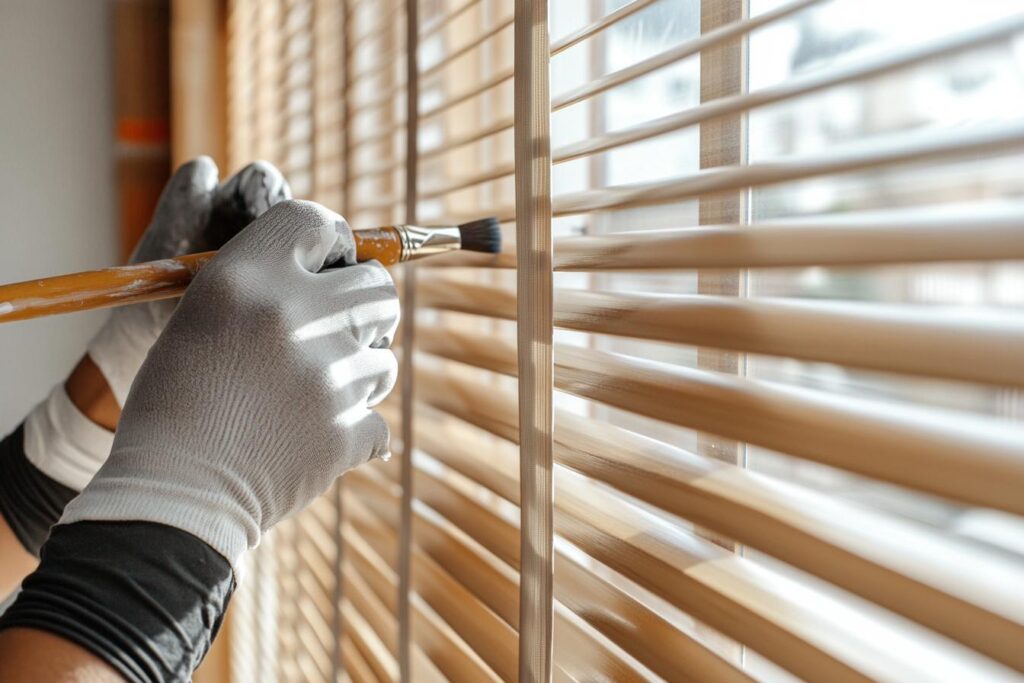
Using Brush or Spray
When using a paintbrush, consider an angled sash or trim brush. This is perfect for getting into the edges and corners of each blind slat. Brushes work well with acrylic-based enamel paints, which offer easy cleaning and durability. You’ll want to paint on a flat surface for stability.
Spray paint gives you a faster and more even finish. Set up your blinds between two trestles using some leftover wood to hold them up. Spray until the base color is gone, and keep the blinds open to avoid sticking. This method often needs less effort but requires more setup for a clean, even coating.
Applying Coats
No matter the tool—brush or spray—multiple coats are essential. With a brush, you can control the paint thickness, but you might need more coats for even coverage. Allow each coat to dry fully before applying the next layer.
Spray paint often dries faster. You can go for two or more light coats rather than a thick layer. This helps avoid drips and runs. Also, ensure even application by keeping a consistent distance from the blinds while spraying.
Reassembly and Installation
After painting your wooden blinds, the next steps are getting them back together and putting them up again. This involves piecing them back properly so they function smoothly and then securing them in place on your windows.
Reassembling Blinds
Bring out all the individual slats and hardware you set aside earlier. Double-check everything against a checklist to ensure no parts are missing.
Start by laying the slats face down on a flat surface. Re-insert any rods, cords, or ladder strings through the slats. Align all parts carefully to avoid any tangling or misalignment. If you’re working with venetian blinds, pay special attention to aligning the slats evenly for a uniform look.
Secure everything tightly to avoid loose parts. For faux wood blinds, ensure that each slat is locked into place. It’s a task that requires patience but pays off with a professional look!
Mounting Back to Windows
Now, let’s get those blinds back in their rightful place! Begin by holding the blinds up to the window to check their fit. For woven wood blinds, this is even more important due to their flexible nature.
Attach the headrail of the blinds to the brackets. If you’ve got additional privacy features, now’s the time to ensure they’re functioning well. Using a screwdriver, tighten each screw firmly to avoid any shifting or loose mounts.
Finally, pull down the cords to check how the blinds roll up and down. This ensures smooth operation and assures you that everything is installed correctly. Consider taking a step back to admire your work with a sense of accomplishment!
Decorating with Painted Blinds
Ever thought about how painted blinds can jazz up your space? Using them in your home decor can add a splash of color and create a cohesive look.

Colors and Color Schemes
Choosing the right colors is key. You can match your blinds with the room’s color scheme or create a striking contrast. Bold colors like blue or green can make the windows pop, while neutral shades blend seamlessly.
Durability
Wondering about durability? Painted blinds can withstand regular use if you choose durable, high-quality paint. Acrylic-based enamel paint is a great option—it’s both durable and easy to clean.
Decorative Beads
Add an extra touch by using decorative beads. String them along the cords for a whimsical vibe or go for metallic beads for a modern look. This small detail can elevate the overall appearance of your blinds.
Design Ideas
- Consider alternating colors on each slat for a playful touch.
- Paint stripes or patterns for a unique style.
- Use stencils for intricate designs if you’re feeling artistic.
Maintenance and Care
To keep your wooden blinds looking great, you’ll need to clean them regularly and touch up any chipped paint. This makes your blinds last longer and stay beautiful.
Regular Cleaning
Cleaning wooden blinds is pretty straightforward. First, dust the slats with a microfiber cloth or a feather duster. Doing this weekly prevents dust buildup. Use a soft cloth and a mild detergent to wipe away any sticky spots. Avoid soaking the wood as this can cause warping.
For deep cleaning, mix a few drops of mild dish soap with warm water. Dampen a soft cloth and gently wipe each slat. Rinse with clean water, then dry with a towel to keep wood from absorbing moisture. If you’re short on time, use a vacuum with a brush attachment for quick cleaning.
Touching Up Paint
Sometimes, your painted wooden blinds will chip or wear over time. To fix this, sand the affected area lightly with fine-grit sandpaper until it’s smooth. Don’t go too hard here—just a bit of sanding will do.
Next, apply a small amount of primer to the sanded area and let it dry. Once dry, use a small brush or touch-up pen to apply the paint. Match the color as closely as possible. Let it dry, then give it a quick final inspection. With these steps, your blinds will look like new!
Frequently Asked Questions
Thinking about painting your wooden blinds but don’t know where to start? You’re not alone. People often wonder about the types of paint to use, whether they can leave the blinds hanging, and how to switch up their colors without replacing them. Let’s dive into these questions!
What types of paint are best for refreshing my wooden blinds?
Acrylic or enamel paints work well because they stick to the wood and are durable. You’ll want something that can hold up to sunlight and cleaning. Make sure to pick a color you love!
Can I paint my wooden blinds while they’re still hanging, or do I need to remove them first?
While it’s tempting to leave them up, removing the blinds makes the job easier and cleaner. You’ll have better access to each slat, avoiding messy paint on cords. But hey, if you’re careful, painting them in place is doable. Just cover nearby areas to prevent splatters.
Get the Fail-Safe Paint Color Playbook (Free PDF)
36 proven colors • 8 ready palettes • trim & sheen guide • printable testing cards.
I’m dreaming of chic black blinds – how can I paint my wooden ones to achieve this look?
Start by sanding the blinds to prep the surface. Then, apply a primer to help the paint stick. A couple of coats of black enamel paint should do the trick. Remember, patience is key for that smooth, sleek finish.
Is spray painting a good method for updating my wooden blinds, and if so, which brand should I choose?
Spray painting can be a quick solution and gives a smooth finish. Brands like Rust-Oleum have products suitable for wood. They dry quickly and offer an even coat. Just spray outdoors or in a well-ventilated area, and maybe practice on a test piece first!
I’m on a mission to change the color of my wooden blinds; is this something I can DIY?
Absolutely! With some patience, it’s a great DIY project. Besides paint, you’ll need sandpaper, primer, and brushes or sprayers. Don’t rush between coats – let them dry well. It’ll take some time, but you’ll be so proud of your custom-looking blinds!
What’s the scoop on giving old wooden blinds a modern update without replacing them?
Painting them is a fantastic way to modernize. You can sand and repaint, giving them a fresh twist. Decorative techniques like ombre or stenciling can add unique flair. Updating hardware or adding valances can complete the new look. Your blinds, your style!