
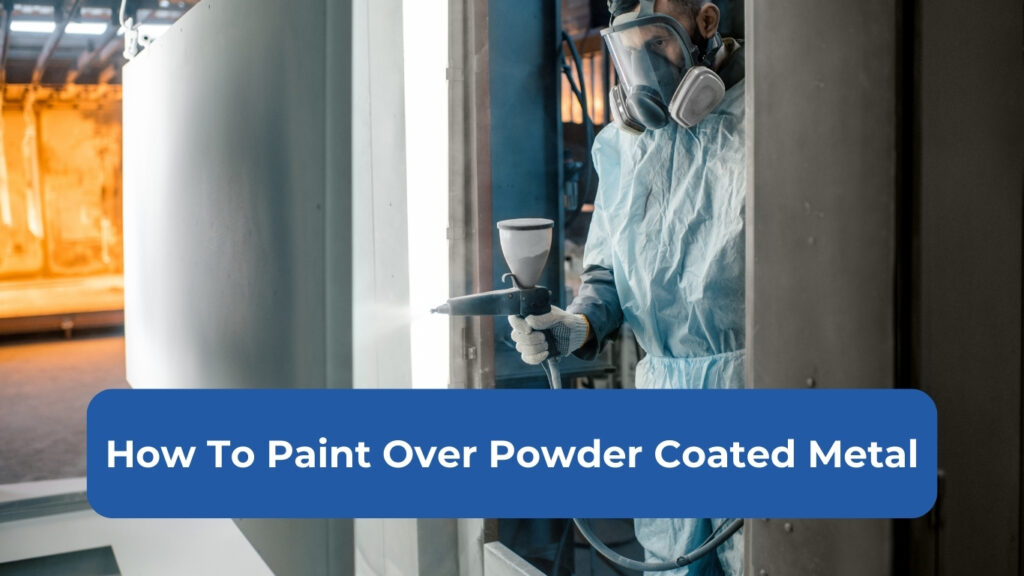
How To Paint Over Powder Coated Metal: Quick Tips for a Flawless Finish
Thinking about painting over powder coated metal? Many folks want to change up the look of their powder coated items. With the right steps, you can successfully paint over powder coated metal surfaces.
First things first, you’ll need to prep the surface. Give that powder coating a good cleaning and a light sanding. This helps the new paint stick better. Don’t worry, you’re not trying to remove all the powder coating – just roughing it up a bit.
Get the Fail-Safe Paint Color Playbook (Free PDF)
36 proven colors • 8 ready palettes • trim & sheen guide • printable testing cards.
Once you’ve prepped, it’s time for primer. Pick one made for metal surfaces. This extra step really helps your new paint job last. After the primer dries, you’re ready to apply your chosen paint. With a little patience and these tips, you’ll have a fresh look for your powder coated metal in no time!
Understanding Powder Coating
Powder coating gives metal surfaces a tough, attractive finish. It’s a popular choice for many products due to its strength and good looks.
What Is Powder Coating?
Powder coating is a dry finishing process. It uses finely ground particles of pigment and resin that are electrostatically charged and sprayed onto a surface. The coated piece is then heated in an oven. This melts the powder and fuses it into a smooth, durable coating.
Unlike liquid paint, powder coating doesn’t use solvents. This makes it more eco-friendly. The process creates a thick, even layer that’s tougher than regular paint. Powder coating comes in many colors and textures. You can choose glossy, matte, or textured finishes.
Powder coating is used on many things you see every day. It’s on appliances, car parts, and outdoor furniture. Even some toys and tools have powder coating.
Benefits of Powder Coating on Metal Surfaces
Powder coating offers several advantages for metal surfaces. It’s incredibly durable and can last for years without chipping or fading. This makes it great for items that get a lot of use or are outdoors.
The finish is resistant to scratches, corrosion, and UV rays. It won’t rust or peel like regular paint might. This means your powder-coated items will look good longer.
Powder coating is also thicker than liquid paint. This can hide small flaws in the metal surface. It gives a smooth, even look that’s hard to achieve with other methods.
Another plus? Powder coating is more environmentally friendly than traditional painting. There are no harmful solvents or VOCs released during the process. This makes it a greener choice for many industries.
Preparing to Paint Over Powder-Coated Metal
Getting ready to paint over powder-coated metal takes some work, but it’s key for a great finish. Let’s go through the steps to set you up for success.
Assess the Current Condition
Start by looking at your powder-coated surface. Is it smooth or rough? Are there any chips or scratches? These details matter.
Look for:
- Rust spots
- Peeling areas
- Dents or dings
If you see major damage, you might need to fix those spots first. Small issues are usually okay to paint over.
Take notes on what you find. This will help you plan your next steps.
Initial Cleaning
A clean surface is a must for good paint adhesion. Here’s how to get your metal squeaky clean:
- Grab a degreaser or strong soap.
- Mix it with warm water.
- Scrub the whole surface with a soft cloth.
- Rinse well with clean water.
- Let it dry completely.
For tough grime, you might need to scrub twice. Don’t skip this step! Paint won’t stick to a dirty surface.
Sanding for Success
Sanding helps the new paint grip better. It’s a bit of work, but it’s worth it.
Here’s what you need:
- Fine-grit sandpaper (180-220 grit)
- Sanding block or electric sander
- Dust mask
- Safety glasses
Sand in circles, not straight lines. You’re not trying to remove all the powder coating, just roughing it up a bit.
After sanding, wipe everything down with a damp cloth. This gets rid of dust. Let it dry before you move on to painting.
Choosing the Right Paint and Primer

Picking the right products is key for painting powder-coated metal. You’ll need special primers and paints to make sure your new finish sticks and lasts.
Selecting a Primer
For your powder-coated surface, you’ll want to start with a good primer. It helps the paint grip better. Here are some top choices:
- Adhesion promoter primers: These create a strong bond between the powder coat and your new paint.
- Epoxy primers: They’re tough and stick well to smooth surfaces.
- Self-etching primers: These slightly roughen the surface as they prime.
Rust-Oleum makes a great adhesion promoter that many DIYers love. It works on tricky surfaces like plastic and chrome too.
Before you prime, give the surface a light sanding. Use fine-grit sandpaper (180-220 grit) in circular motions. This helps the primer stick better.
Suitable Paint Types for Powder-Coated Surfaces
After priming, it’s time to paint. Not all paints work well on powder coat. Here are your best bets:
- Epoxy-based paints: These are the top choice. They bond well and last long.
- Urethane enamels: They’re durable and resist chipping.
- Enamel paints: Good for both indoor and outdoor use.
Avoid regular latex or oil-based paints. They won’t stick well to powder coat.
Remember to match your paint to your primer. If you used an epoxy primer, stick with epoxy paint. This ensures the best adhesion and durability.
Always test your paint on a small, hidden area first. This lets you check how it looks and sticks before doing the whole project.
The Priming Process
Priming powder-coated metal is a key step for a successful paint job. It helps the new paint stick and creates a smooth finish. Let’s look at how to apply primer and make sure it sticks well.
Applying Primer for Powder-Coated Metal
To start, pick a primer made for metal surfaces. Zinsser Bulls Eye 1-2-3 Primer Sealer is a good choice. It sticks to many surfaces and blocks stains.
Here’s how to apply primer:
- Clean the metal thoroughly
- Sand lightly with 180-220 grit sandpaper
- Wipe off dust with a clean cloth
- Shake the primer well
- Apply thin, even coats with a brush or roller
- Let each coat dry before adding more
Don’t rush! Take your time to get even coverage. This will make your paint job look much better.
Ensuring Good Adhesion
Good adhesion is crucial for a lasting paint job. Here are some tips:
- Use a bonding primer for extra stickiness
- Apply primer in a well-ventilated area
- Follow the primer’s drying time instructions
- Lightly sand between coats for better grip
Remember, surface prep is key. A clean, slightly rough surface helps primer stick better. If you’re using a brush, choose one with synthetic bristles. For rollers, foam ones work well on smooth metal.
Test the primer on a small spot first. This lets you check how it sticks and looks before doing the whole project.
Painting Over Powder-Coating

You can paint over powder-coated metal with the right prep and techniques. Let’s look at two main methods: using brushes and rollers, or spraying for an even finish.
Brush and Roller Techniques
To paint over powder coat with brushes or rollers, start by cleaning the surface. Use a degreaser to remove any dirt or oils. Next, sand the surface lightly with 180-220 grit sandpaper. This helps the new paint stick better.
Choose a paint made for metal surfaces. Apply a thin coat with a foam roller for a smooth finish. Use a brush for edges and hard-to-reach spots. Let it dry completely between coats.
<paint_over_powder_coat> brush and roller </paint_over_powder_coat>
Pro tip: Apply paint in thin, even layers. This prevents drips and gives you a smoother look.
Using a Spray Gun for an Even Coat
Spray painting can give you a super smooth finish on powder-coated metal. First, mask off any areas you don’t want painted. Set up in a well-ventilated area or outside on a calm day.
Hold the spray gun about 6-8 inches from the surface. Move in steady, overlapping strokes. Keep your arm moving to avoid heavy spots.
<paint_over_powder_coat> spray gun </paint_over_powder_coat>
Start with a light coat and let it dry. Add more thin coats until you get the coverage you want. This method is great for large, flat surfaces.
Remember to wear a mask and safety glasses when spray painting. Clean your gun right after use to keep it in good shape for next time.
Final Touches and Maintenance
After painting your powder-coated metal, a few extra steps will help protect your work and keep it looking great. These finishing touches make a big difference in the long run.
Applying a Clear Protective Coat
Want to give your paint job extra staying power? A clear coat is your secret weapon! This thin layer acts like a shield, guarding against scratches and fading. Here’s how to do it:
- Clean the painted surface
- Apply thin, even coats
- Let each coat dry completely
- Sand lightly between coats for a smooth finish
Use a spray-on clear coat for best results. It’s easier to apply evenly and won’t leave brush marks. Two or three coats should do the trick. Remember, patience pays off – don’t rush the drying process!
Caring for Your Newly Painted Metal
Your freshly painted metal needs some TLC to stay looking sharp. Regular cleaning is key! Use mild soap and water to wipe away dirt and grime. Avoid harsh chemicals that could damage the paint.
Keep an eye out for chips or scratches. Touch them up quickly to prevent rust. If you notice fading, a fresh coat of paint might be needed.
Protect your metal from extreme weather when possible. Sun, rain, and snow can all take a toll. A little shelter goes a long way in preserving your paint job.
Troubleshooting Common Paint Issues
Painting over powder coated metal can be tricky. You might run into a few bumps along the way, but don’t worry! Let’s look at some common problems and how to fix them.
Preventing and Repairing Peeling and Chipping
Is your new paint job peeling off? Yikes! This often happens when the surface isn’t prepped right. To avoid this:
- Clean the metal really well
- Sand it lightly
- Use a good primer
If you’re already seeing chips, don’t panic. Here’s what to do:
- Sand the damaged area
- Clean it up
- Apply touch-up paint
For big peeling spots, you might need to strip it all and start over. But hey, practice makes perfect!
Dealing with Oxidation and Rust
Rust is the enemy of metal. If you spot any rusty patches:
- Sand them down
- Apply a rust converter
- Prime before painting
To keep rust away:
- Store your painted items in a dry place
- Touch up scratches quickly
- Apply a clear coat for extra protection
Remember, rust spreads like . Catch it early and you’ll save yourself a headache later!
Special Considerations for Different Metals
When painting over powder-coated metals, you need to think about the specific type of metal you’re working with. Different metals have unique properties that can affect how paint sticks and lasts.
Working with Aluminum
Aluminum poses some challenges when painting over powder coating. Its surface tends to be slicker than other metals, making it tougher for paint to stick. Here’s what you should do:
- Clean the surface thoroughly with a degreaser.
- Scuff the powder coat with 220-grit sandpaper.
- Wipe away dust with a tack cloth.
- Apply a self-etching primer made for aluminum.
- Let the primer dry completely.
Once you’ve prepped the surface, you can paint as usual. Remember, aluminum expands and contracts more than other metals with temperature changes. This means you should choose a flexible paint that can move with the metal.
Approaches for Other Metals
For steel, iron, and other metals, the process is similar but with some key differences:
- Use a wire brush to remove any rust before sanding.
- Apply a rust-inhibiting primer after sanding.
- Choose a paint that matches the metal’s use (heat-resistant for outdoor items, for example).
Steel metal surface that can be painted over powder coating.
Copper and brass need special care. These metals can react with certain paints, so pick one that’s made specifically for them. Always test your paint on a small, hidden area first to make sure it doesn’t cause a reaction.
Advanced Techniques and Tips
Want to take your powder coat painting skills to the next level? Let’s explore some pro methods that’ll give you amazing results. You’ll learn about powerful cleaning tricks, how to prep surfaces like a pro, and safety tips to keep you breathing easy.
Using Solvent Cleaners
Solvent cleaners are your secret weapon for tackling tough grime on powder coated surfaces. These powerful liquids cut through oils and residues that regular soap can’t touch. Here’s how to use them:
- Pick a solvent cleaner made for metal surfaces
- Apply it with a lint-free cloth
- Rub in circular motions to lift dirt
- Wipe away with a clean, dry cloth
Be careful though! Some solvents can be harsh. Test a small, hidden area first to make sure it doesn’t damage the powder coat. And don’t forget your safety gear – gloves and a mask are a must when working with these strong cleaners.
Sandblasting for Enhanced Adhesion
Want paint that really sticks? Sandblasting is your go-to technique. This method roughens up the surface, giving new paint tons of tiny grooves to grab onto. Here’s what you need to know:
- Use fine-grit sand for a gentle abrasion
- Keep the nozzle moving to avoid damaging the powder coat
- Wear protective gear – goggles, gloves, and a respirator
After sandblasting, your surface will look a bit dull. That’s perfect! It means you’ve created an ideal texture for paint to bond with. Just remember to clean off all the dust before you start painting.
The Role of a Well-Ventilated Area
Painting in a stuffy room is no fun – and it can be dangerous too. Good ventilation is key for your health and the quality of your paint job. Here’s how to set up a well-ventilated workspace:
- Open windows and doors to create airflow
- Use fans to push fumes outside
- If indoors, consider a portable exhaust system
Fresh air helps paint dry evenly and prevents nasty fume build-up. Plus, you’ll feel better and work more comfortably. If you’re painting outdoors, pick a calm day to avoid dust blowing onto your fresh paint. Your lungs (and your paint job) will thank you!
Frequently Asked Questions
Painting over powder-coated metal can be tricky. Let’s tackle some common questions to help you get it right.
What type of primer should be used on powder-coated metal before repainting?
You’ll want to use an epoxy primer. It sticks well to powder coating and gives the new paint a good base. Make sure to clean the surface first with soap and water. Then lightly sand it before applying the primer.
Can you sandblast powder coating before applying a new coat of paint?
Yes, you can sandblast powder coating. This method removes the old coating completely. It gives you a clean slate for new paint. But be careful – sandblasting can damage the metal if you’re not careful.
Get the Fail-Safe Paint Color Playbook (Free PDF)
36 proven colors • 8 ready palettes • trim & sheen guide • printable testing cards.
Is it possible to use Rust-Oleum products to repaint over powder-coated surfaces?
Rust-Oleum makes paints that work on powder-coated surfaces. Their Universal line is a good choice. It sticks to many surfaces, including powder coating. Just clean and sand the surface first for best results.
Which spray paints are recommended for use on powder-coated metals?
Look for spray paints made for metal surfaces. Krylon Fusion and Rust-Oleum Universal are good options. They bond well to powder coating. Choose a paint that matches your metal type for best results.
How can you ensure new paint adheres well to powder-coated aluminium?
Clean the surface really well. Use a degreaser to remove any oils. Then lightly sand the powder coating to rough it up. This helps the new paint stick. Apply a primer made for aluminum before your top coat.
What steps are necessary to paint over a powder-coated surface without damaging it?
Start by cleaning the surface with soap and water. Then lightly sand it to create some texture. Wipe away any dust. Apply a bonding primer made for powder coating. Let the primer dry fully. Then paint with your chosen color. Use thin coats and let each one dry before adding more.